Configuring Access Rules
The Access Rules
page on the ISA web portal allows administrators to define rules to allow or deny remote user access to corporate
resources. referenced in access rules.
The following types of access rules can be created:
- Allow or deny access to an application or application group from one or more users. The application group must be pre-defined on the Application Group page. The application must be defined within the access rule by specifying an IP address or network with one or more port numbers separated by commas.
- Allow or deny access to an application or application group from one or more user groups. The application group must be pre-defined on the Application Group page. The application must be defined within the access rule by specifying an IP address or network with one or more port numbers separated by commas
- Allow or deny
access to an application or application group from an IP address or network and
one or more port numbers. The application group must be pre-defined on the
Application Group page. The application must be defined within the access rule
by specifying an IP address or network with one or more port numbers separated
by commas.
- When an allow
rule is defined, the ISA controller will initiate a process to ensure proper
route configuration. It involves two distinct steps:
- The controller
will send the relevant route details to the ISA User Agent. These details are
used to configure routes on the end-user device.
- Simultaneously,
the controller will send route information, including port numbers, to the
Gateway Agent for configuring routes on the designated gateway.
- Access rules are enforced based on the specificity of the rule. A more specific rule takes precedence over a less specific rule.
A rule that applies to an IP address has priority over a rule that applies to a network, all other parameters being equal.
A deny rule to an IP address takes precedence over an allow rule to a network, all other parameters being equal.
- Access rules are only applicable to remote users connecting using the ISA User Agent. Rules defined on the Access Rule page do not govern logging into the ISA web portal.
This user guide describes the various configuration options to manage access rules on the ISA web portal.
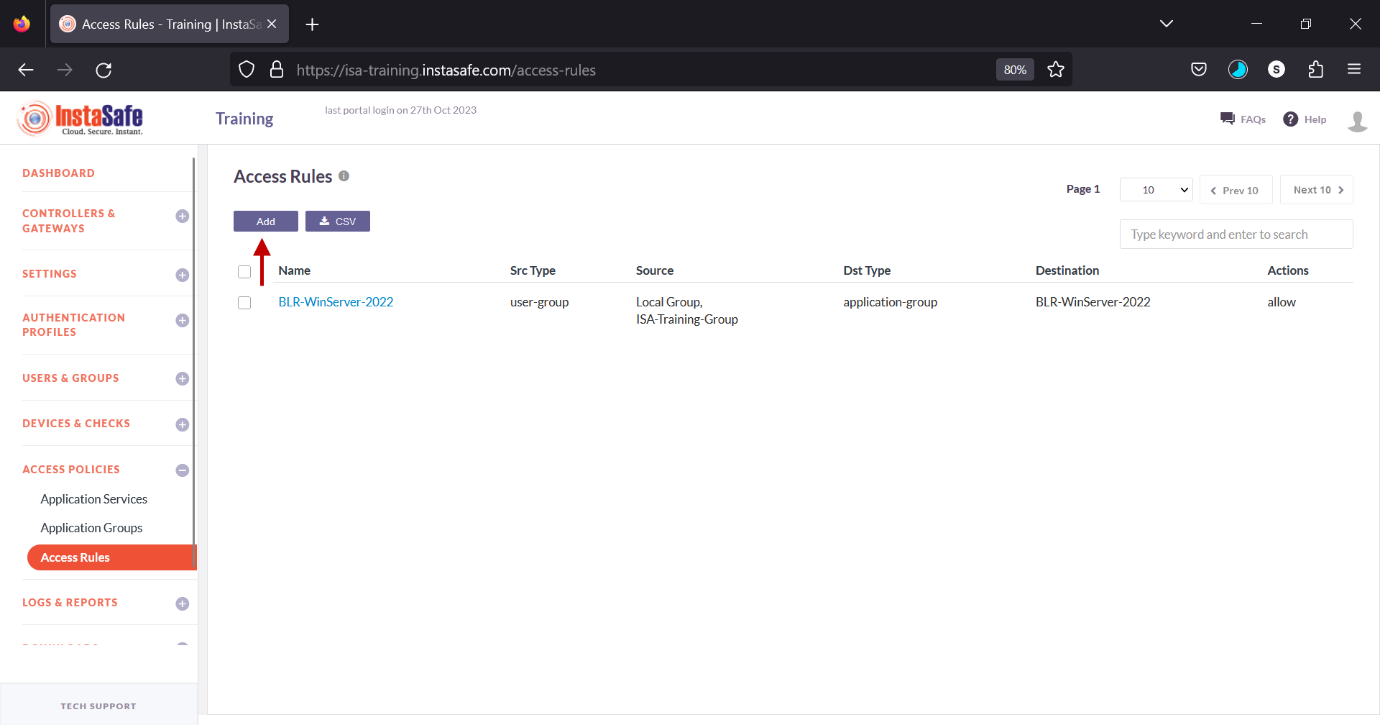
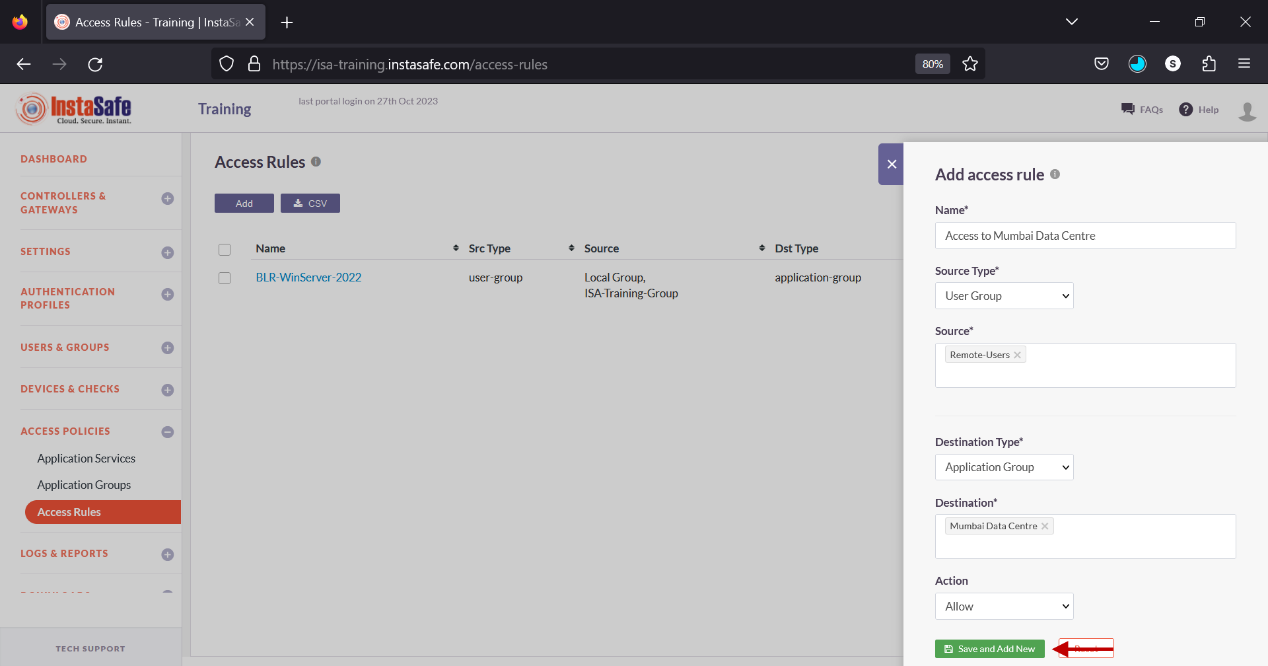
Add Access Rules
Login to the ISA web console using administrator credentials.

Navigate to the Access Rules page under the ACCESS POLICIES menu.
Click the Add button at the top.
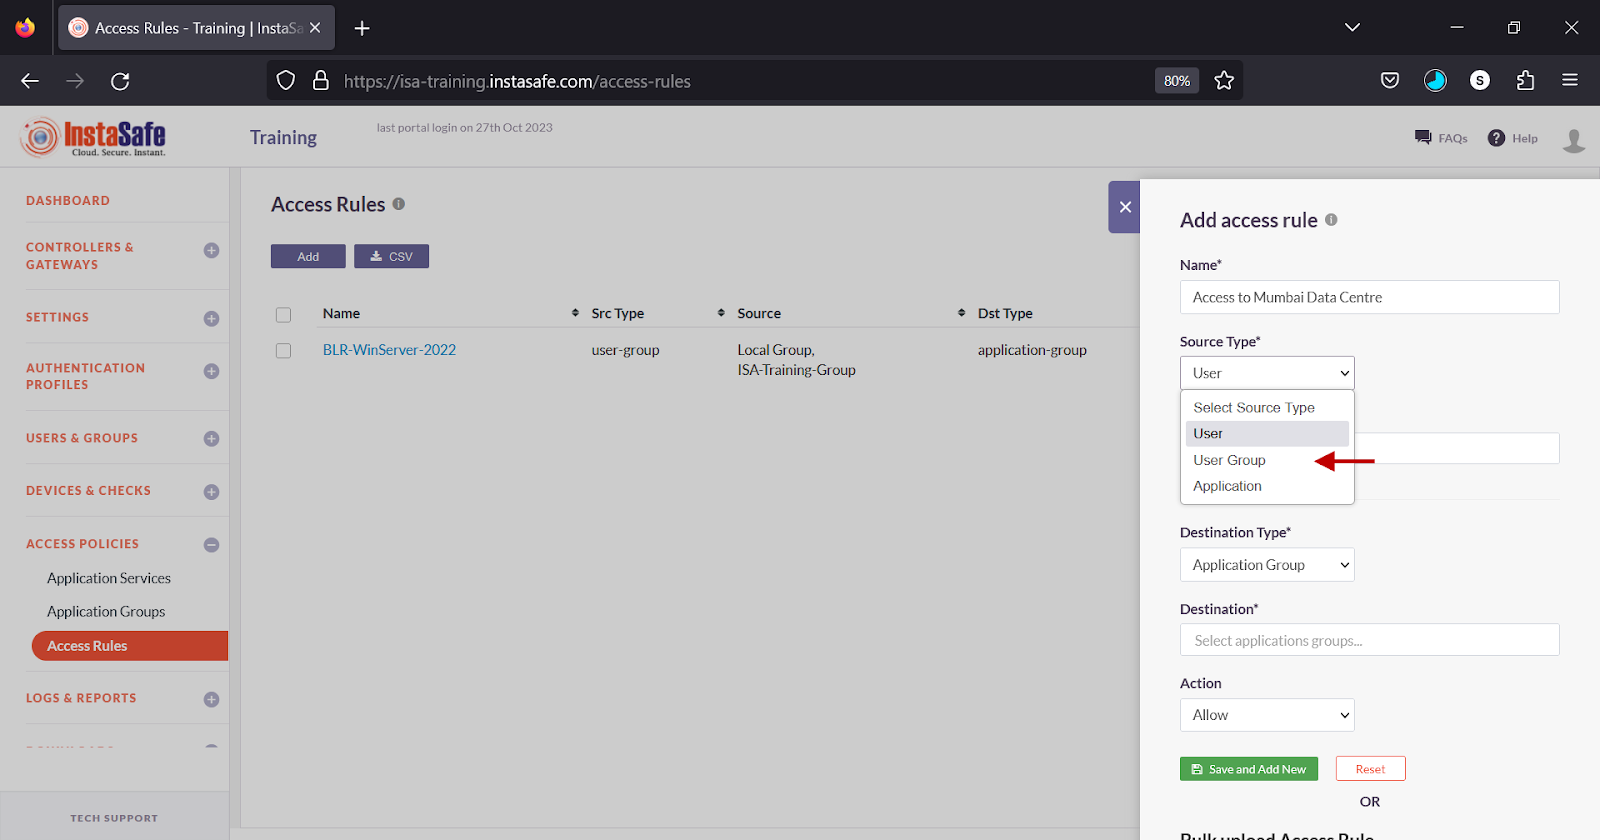
On the Add access rule window, under Name, enter a name for the access rule. Characters A-Z, a-z, 0-9 are allowed in this field. The maximum number of characters allowed is 50.
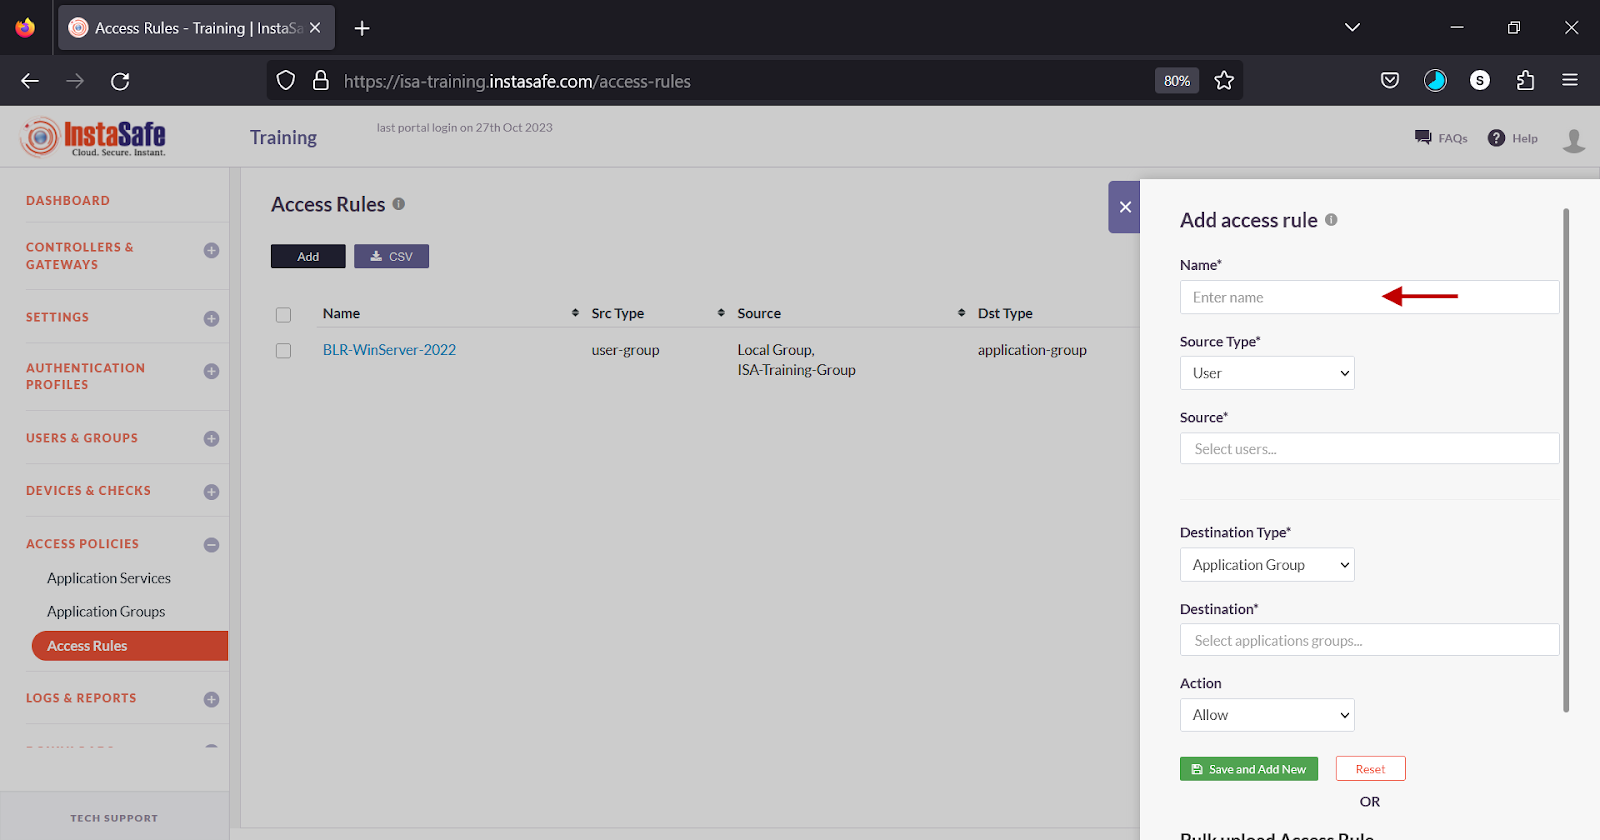
Click the Source Type drop-down.
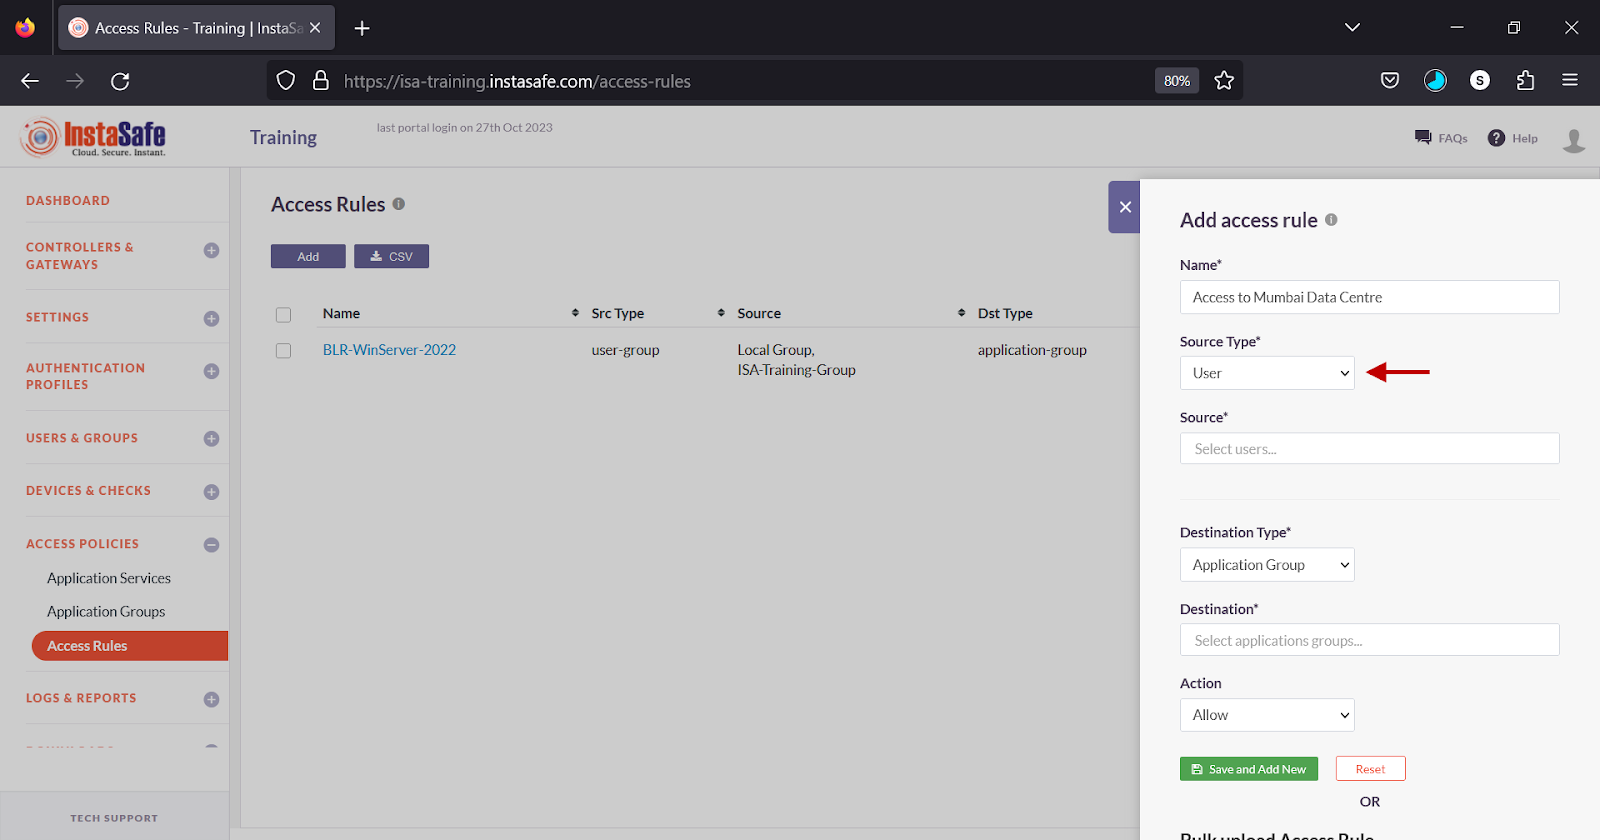
Select User, User Group, or Application. In this example, we select User Group.
Click the Source field.
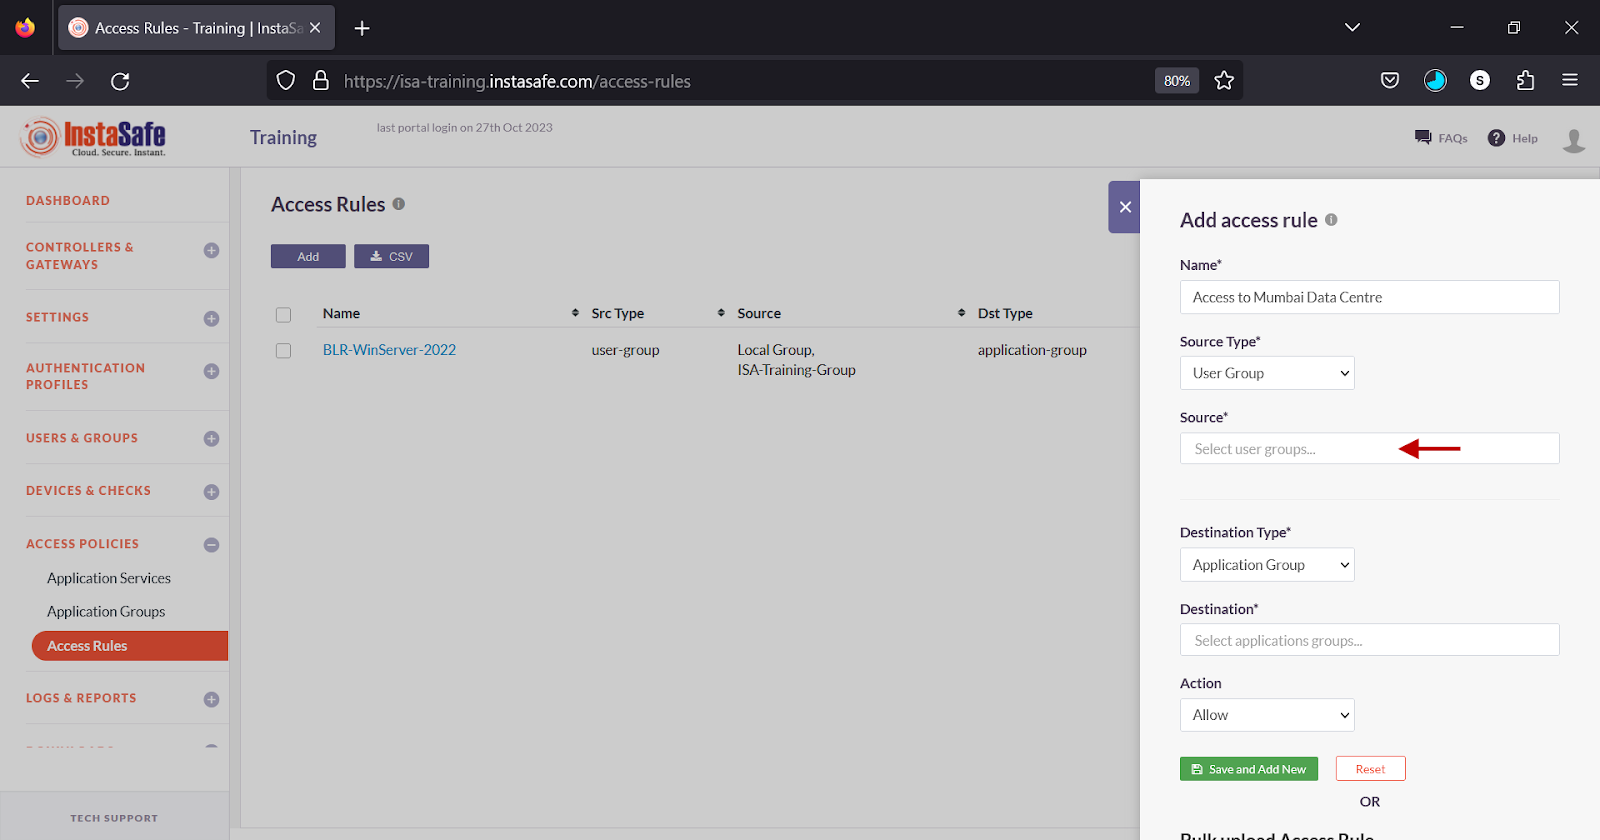
From the drop-down list, select the user group. Multiple user groups can be added to this field.

Click the Destination Type drop-down.

Select Application or Application Group.
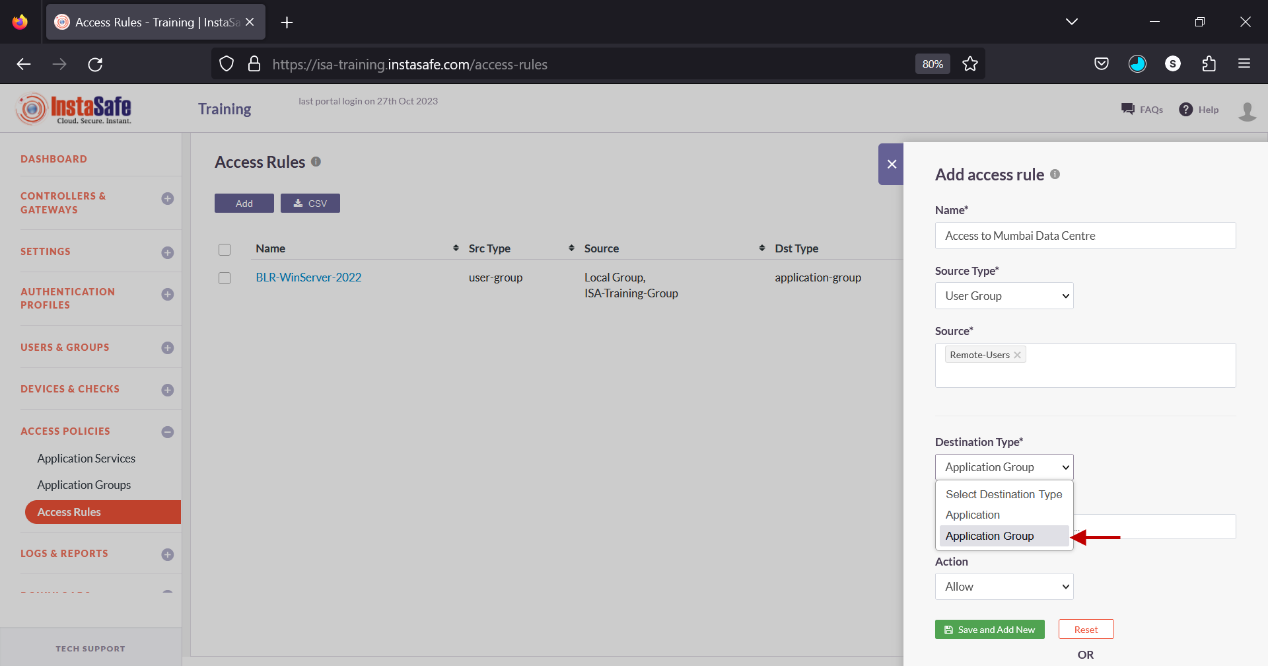
Select the application groups. Multiple application groups can be added to the field.

Click Action.

Select either Allow or Deny.
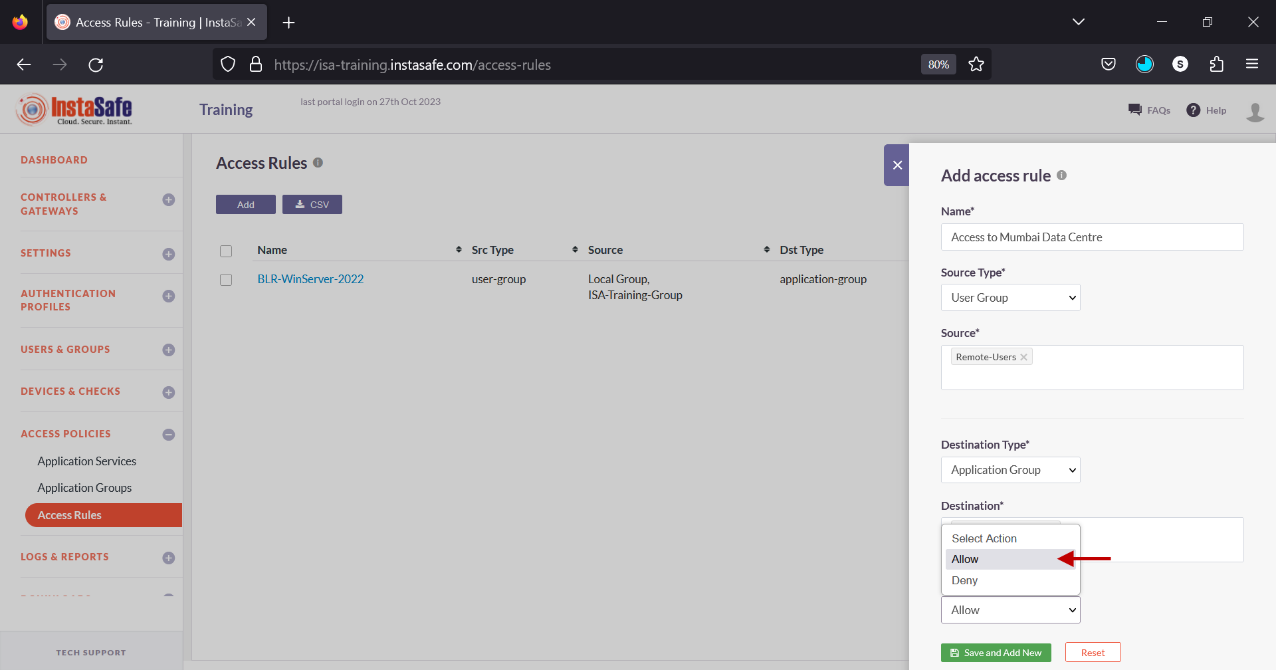
Click Save and Add new.
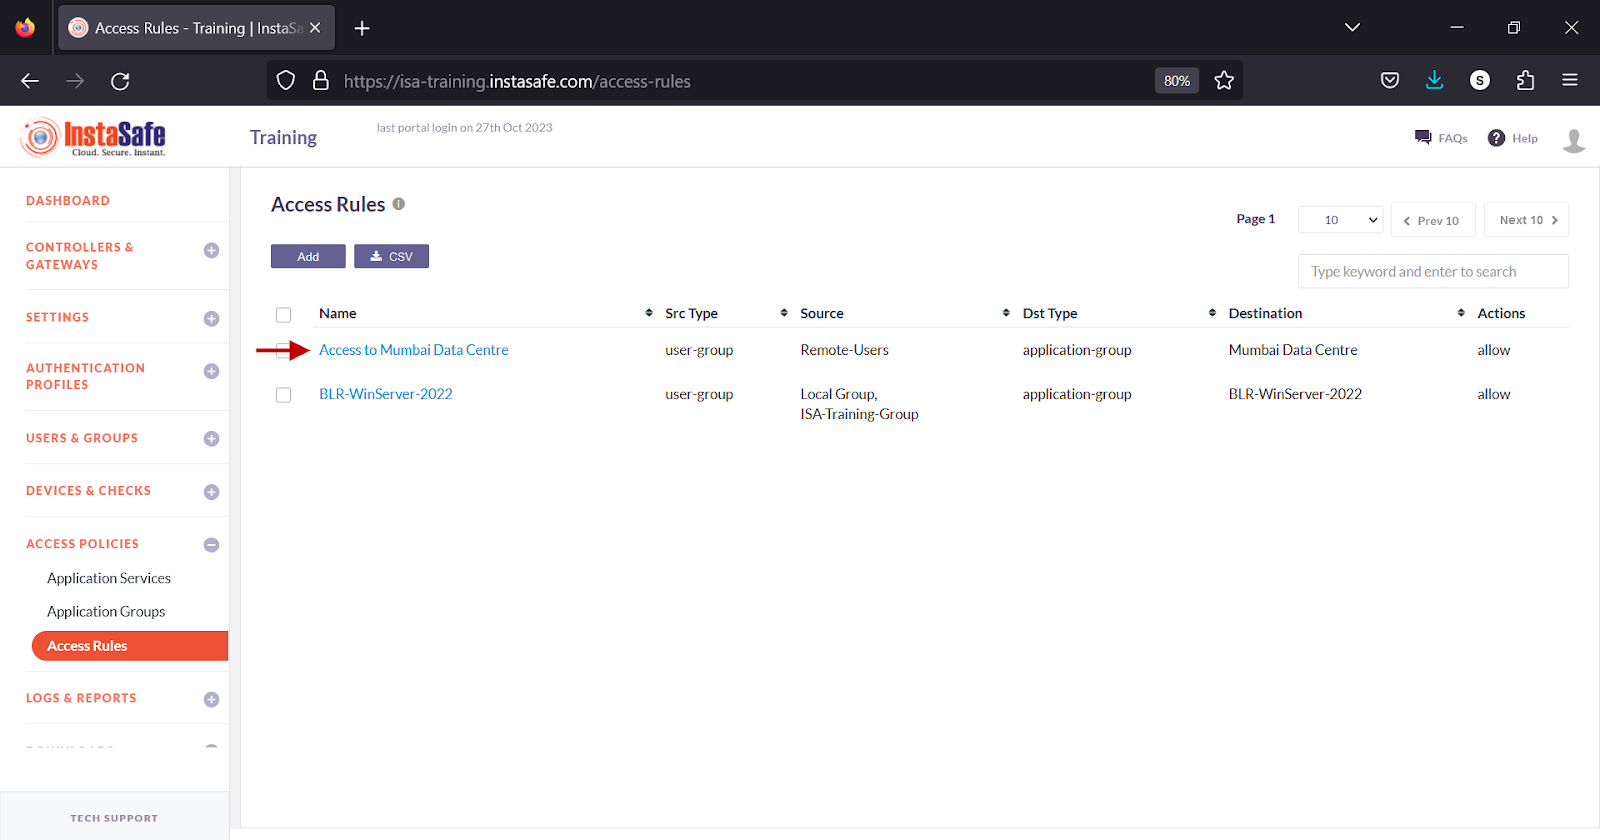
The new access rule is listed on the page.

Edit Access Rule
- On the Access Rule page, click the name of the access rule you want to edit.
- In the ACL details window, click the Edit button.

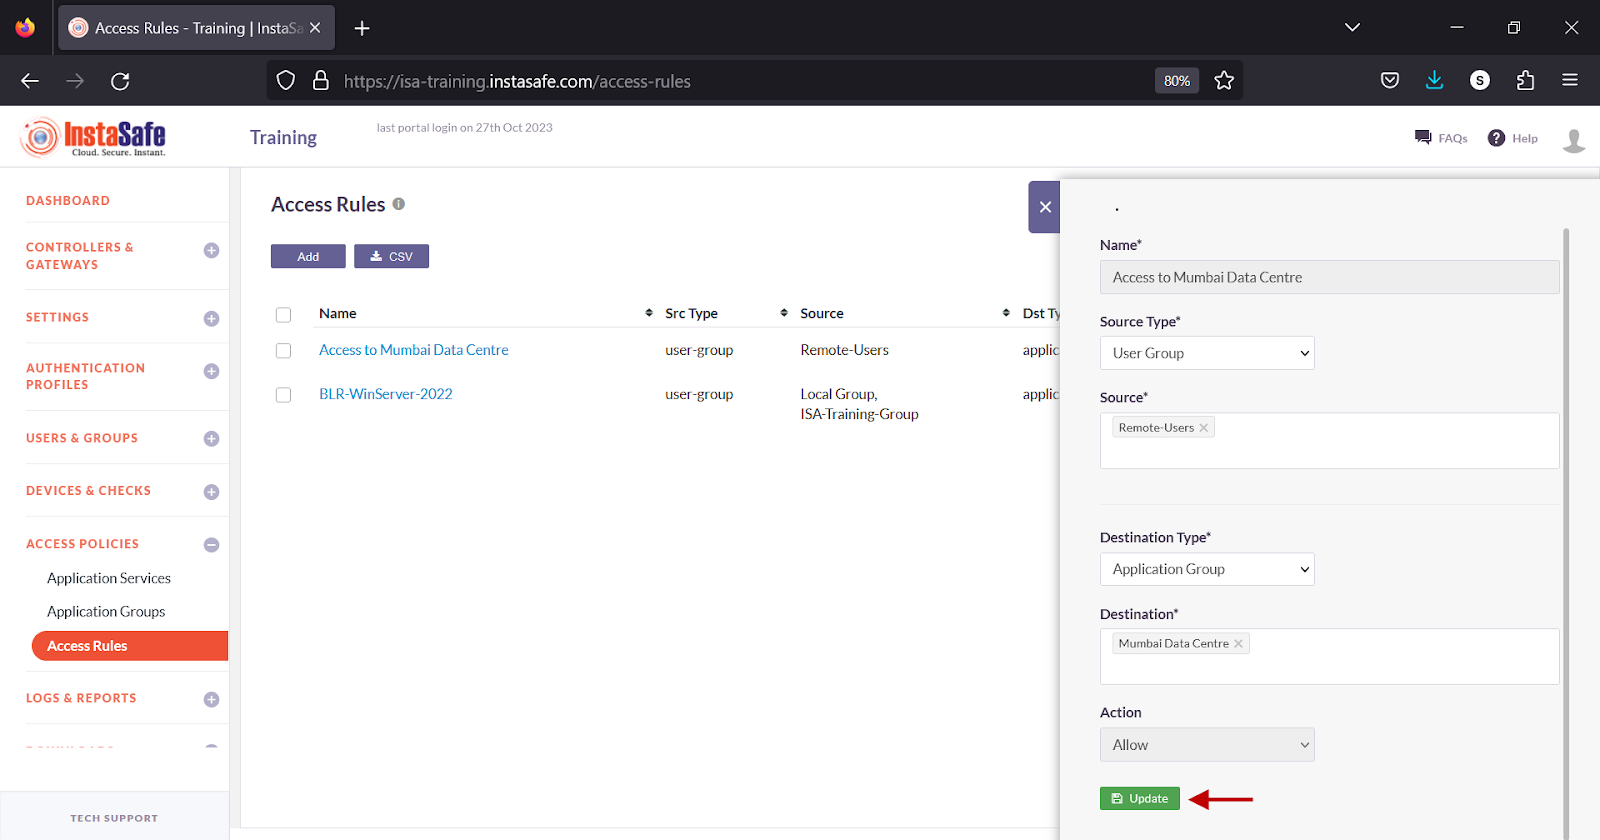
- In the Update access rule window, you can edit the Destination, Destination Type, Source, and Source Type fields. You can add or delete the user, user group, application, or application group by clicking the “x” icon.
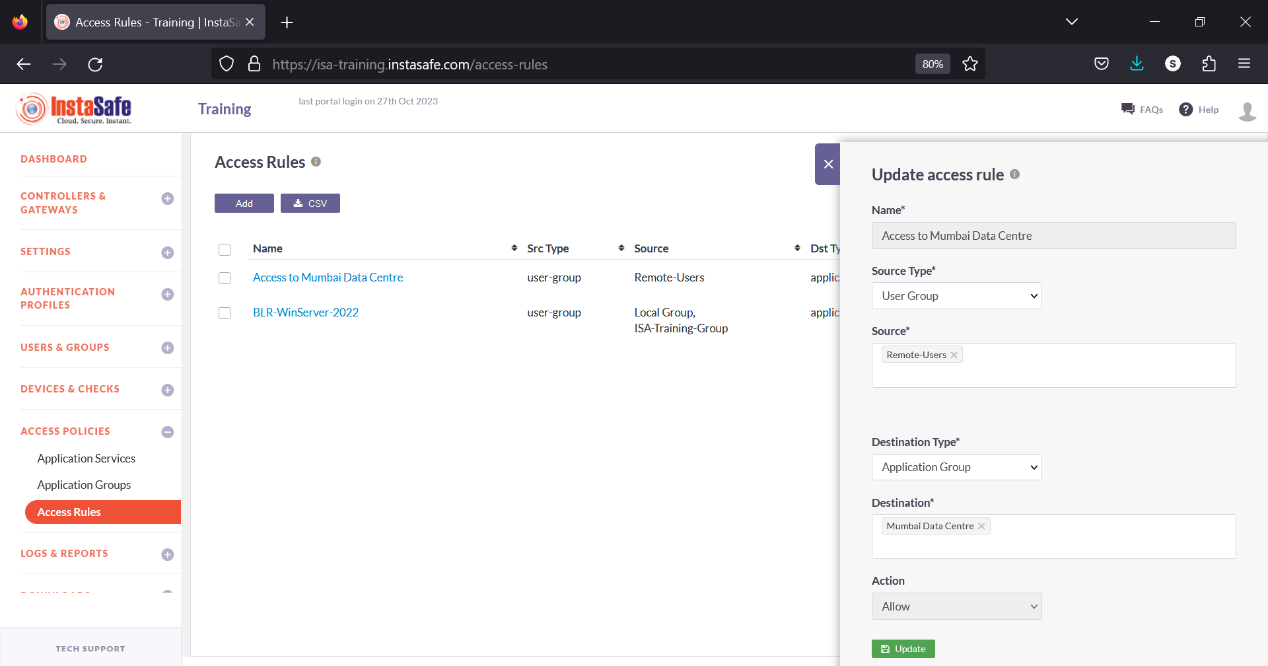
- Click Update to save the change.
Add Access Rules in Bulk
This option allows the administrator to add a large number of access rules at once.
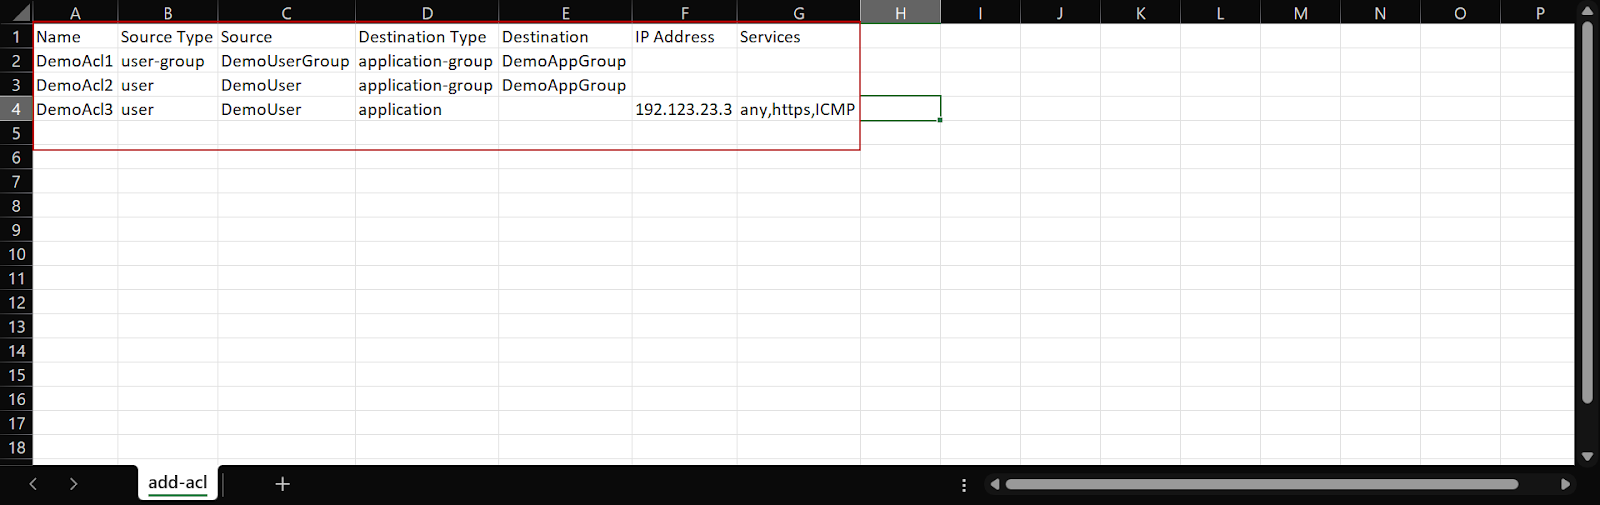
Supported fields in the file are:
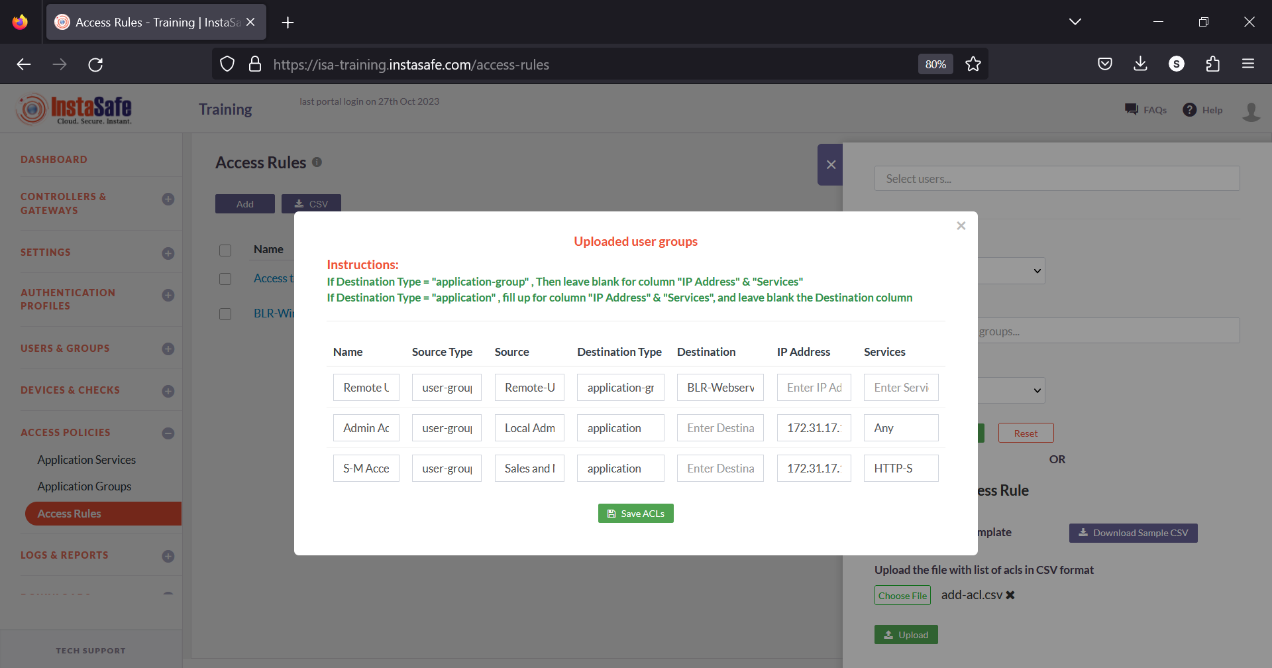
Name – A name for the access rule.
Source Type – Either user or user group.
Source – Enter the name of the users or user groups separated by commas.
Destination Type – Either application or application group.
Destination – If Destination Type is set to Application Group, enter the name of the application groups separated by commas.. If Destination Type is set to Application, leave the field blank.
IP Address – If Destination Type is set to Application, enter the IP addresses of remote resources separated by commas. If Destination Type is set to Application Group, leave the field blank.
Services - If Destination Type is set to Application, enter the port numbers of remote resources separated by commas. If Destination Type is set to Application Group, leave the field blank.
- On the Access Rules page, click the Add button.

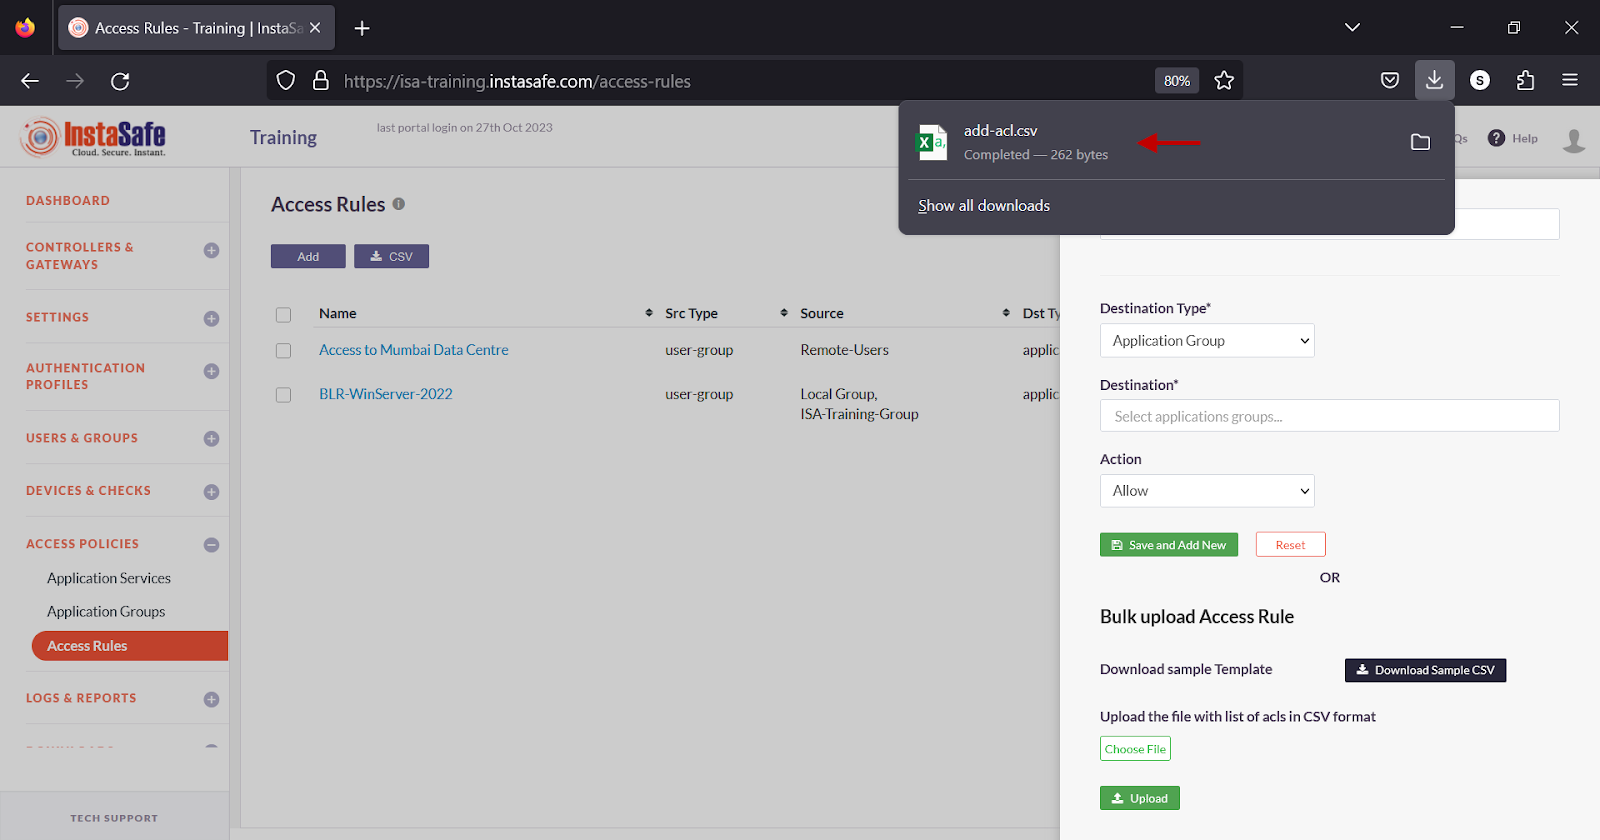
- Under Bulk upload Access Rule, click Download Sample CSV.

- Open the file using a spreadsheet application.
- The sample CSV file is filled with sample values. Enter your information as per the samples provided.
- Enter the information in their respective fields and save it.

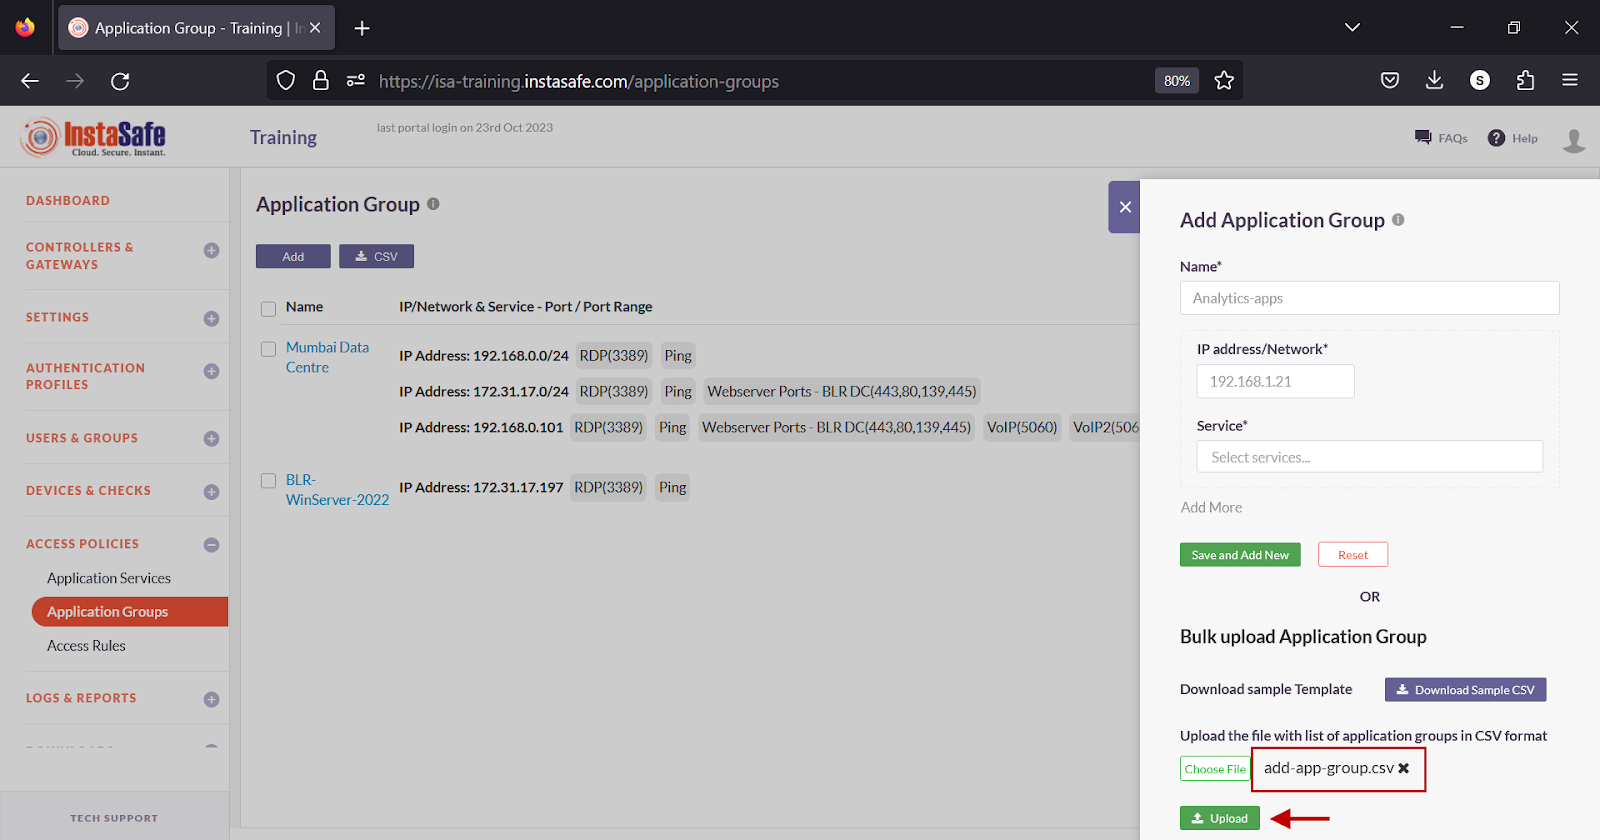
- Under Upload the file …., click Choose File and select the file from the saved location.
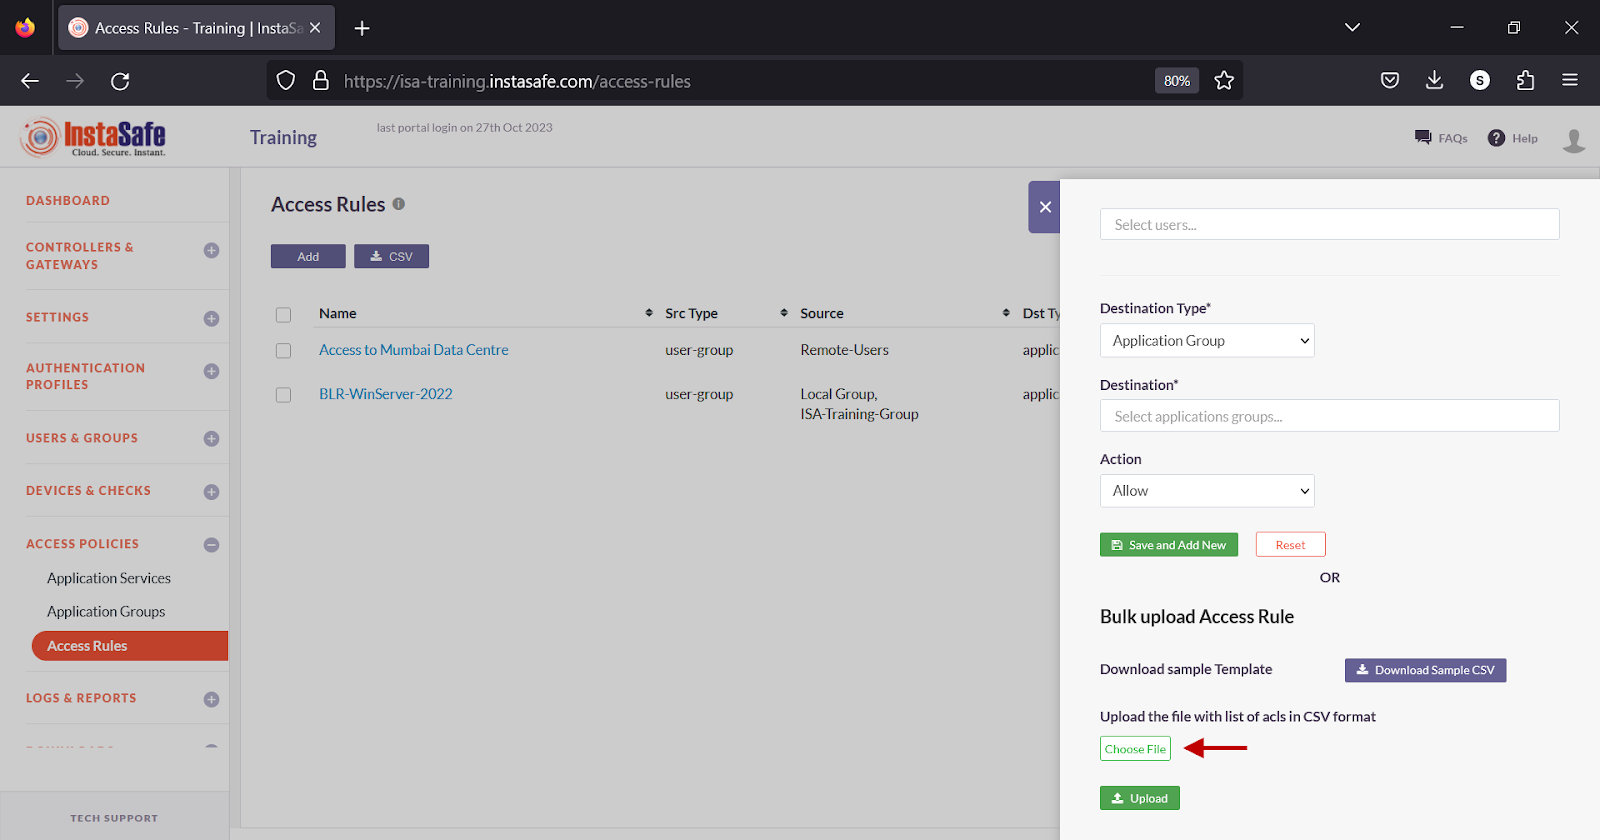
- Click Upload.
- In the Uploaded Access Rules window, review the information and click Save ACLs.
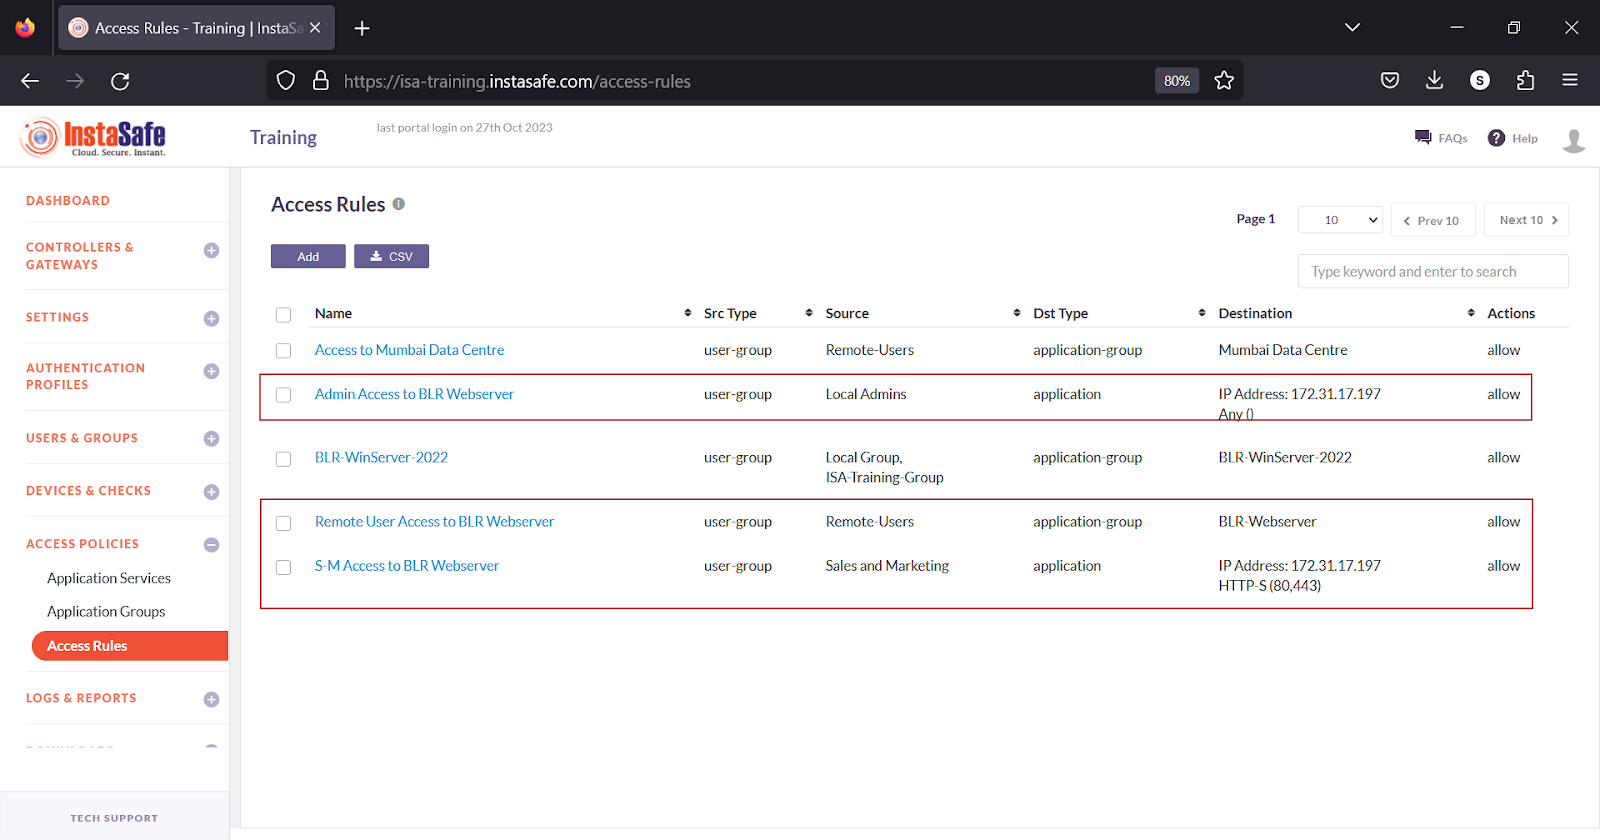
- The newly created access rules are listed on the page.
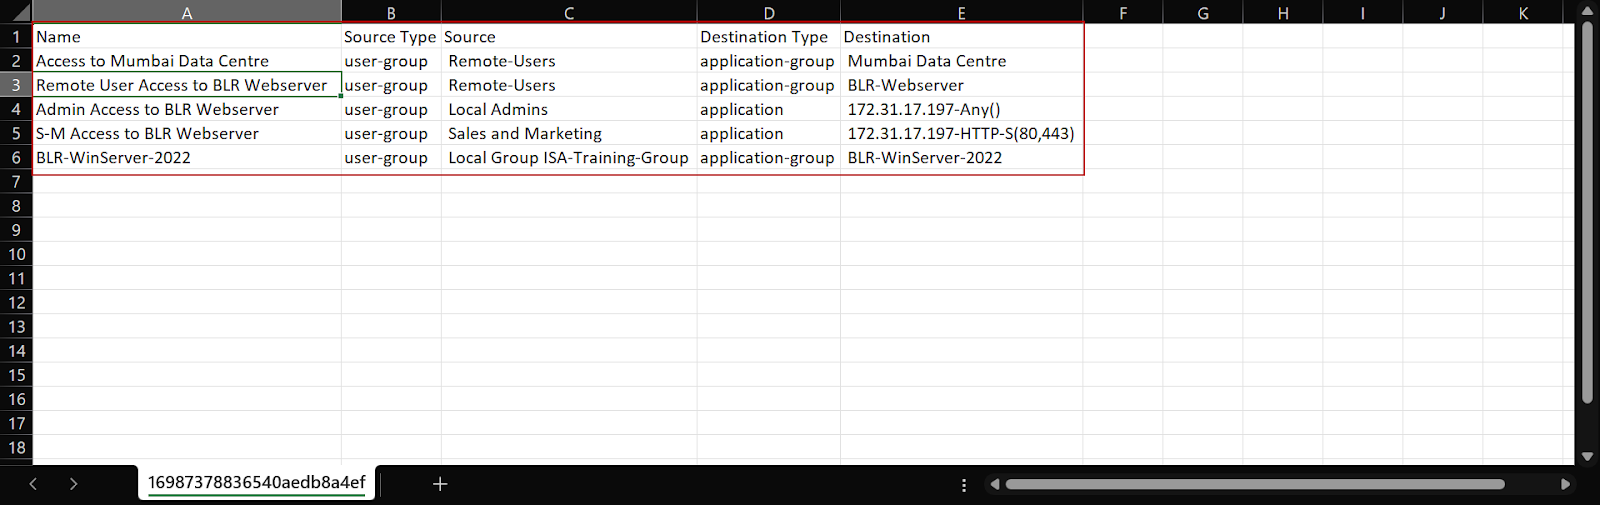
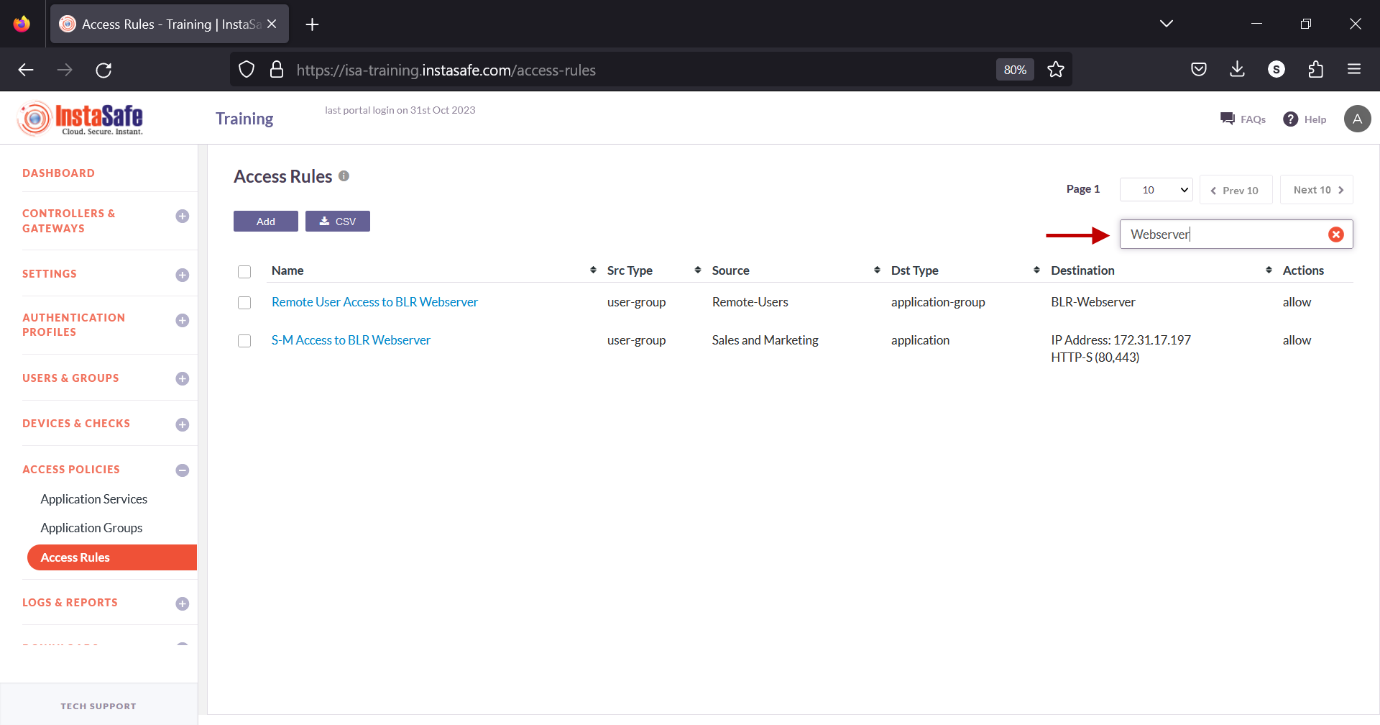
Download Access Rules List
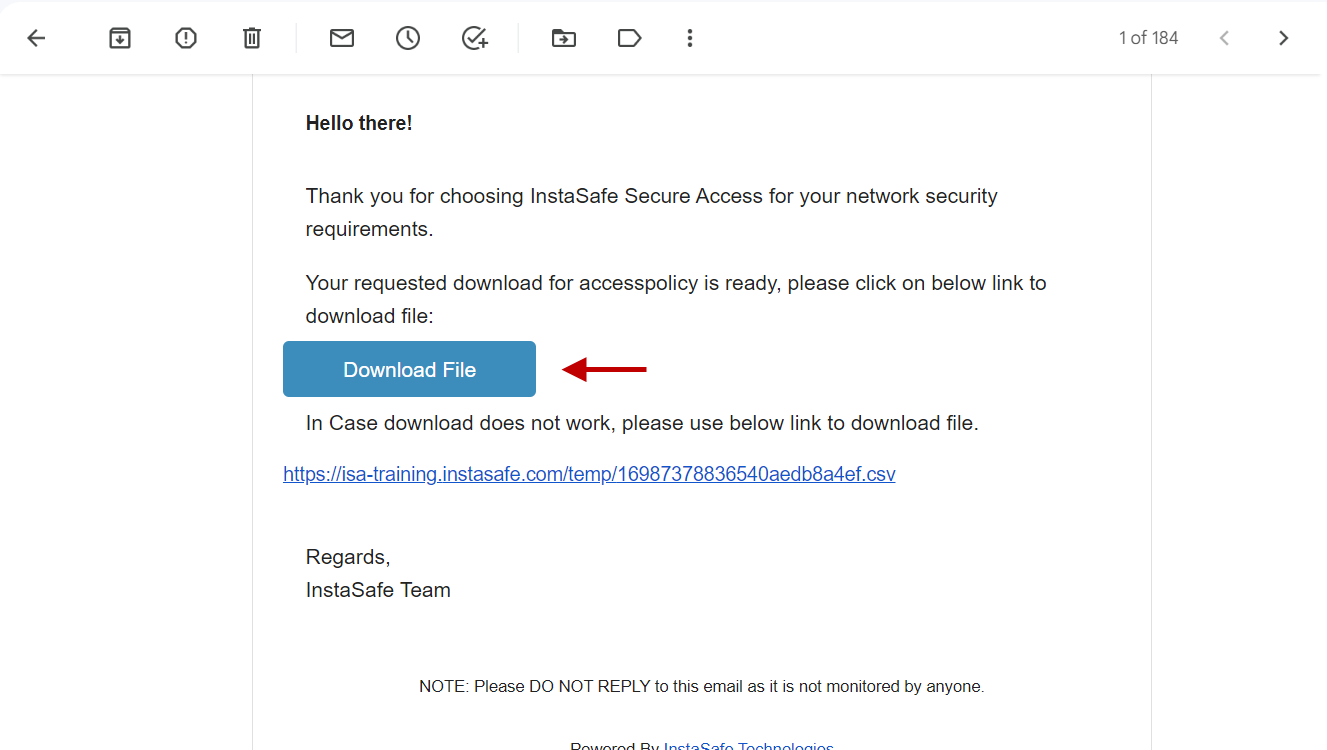
ISA web portal administrators can download the complete list of access rules by clicking on the CSV button on the Access Rules page. An email with the link to download the file in CSV format is sent to the logged-in administrator’s email address. The file has the following information:
Name – Names of the access rule.
Source Type – Either user or user group.
Source –Name of the users or user groups.
Destination Type – Either application or application group.
Destination – If Destination Type is Application Group, the names of the application groups. If Destination Type is set to Application, the IP addresses and service names of the applications separated by hyphens.
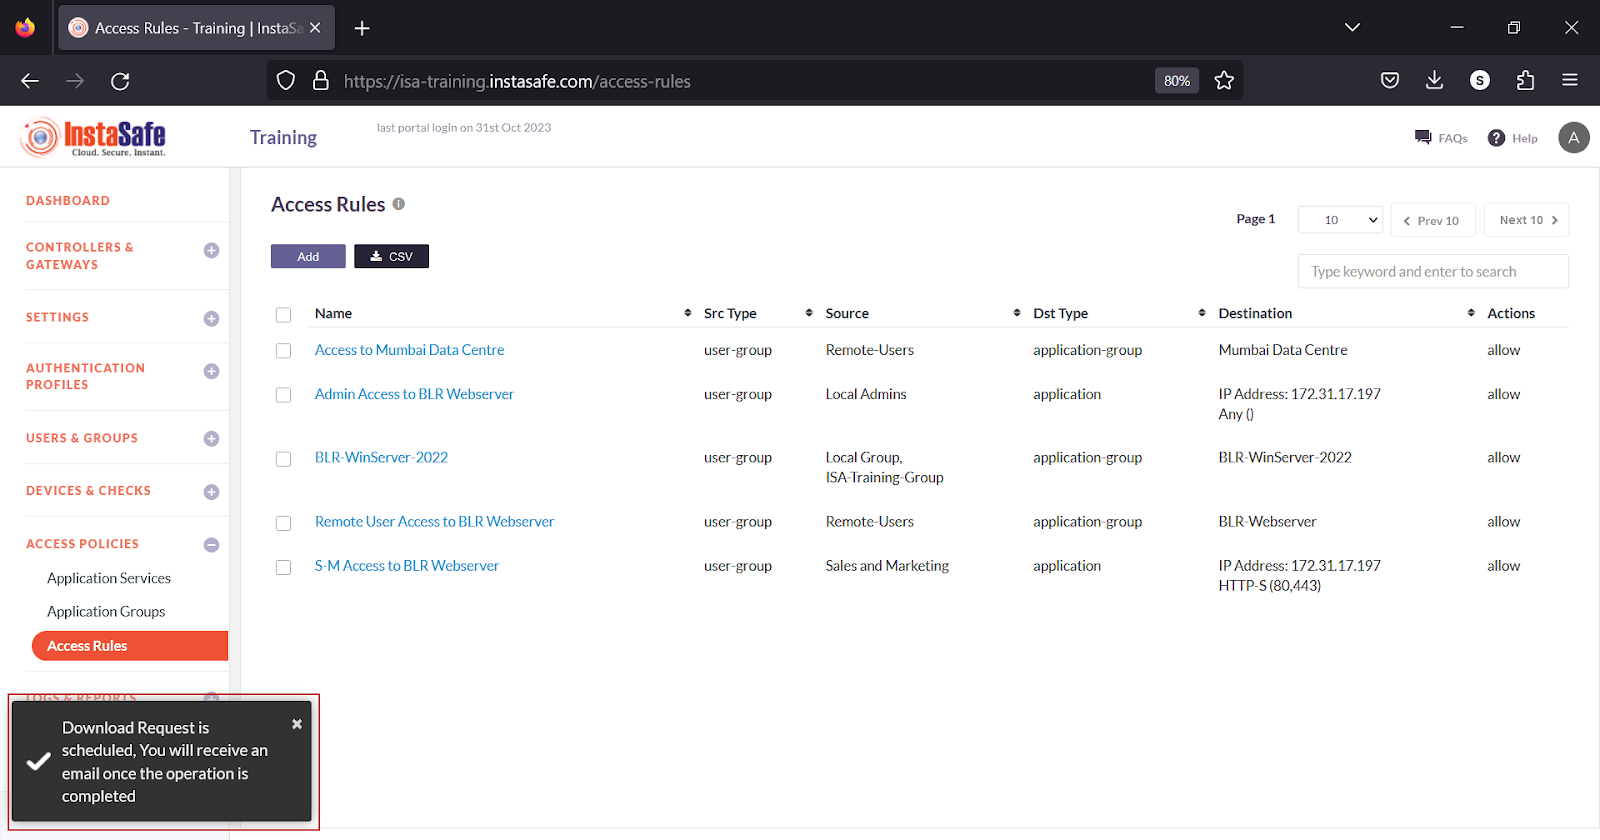
- On the Access Rules page, click the CSV button at the top.

- A message that an email is scheduled to be sent to the administrator’s email address is displayed.
- Click the download link within the email.
- View the file in a spreadsheet application.
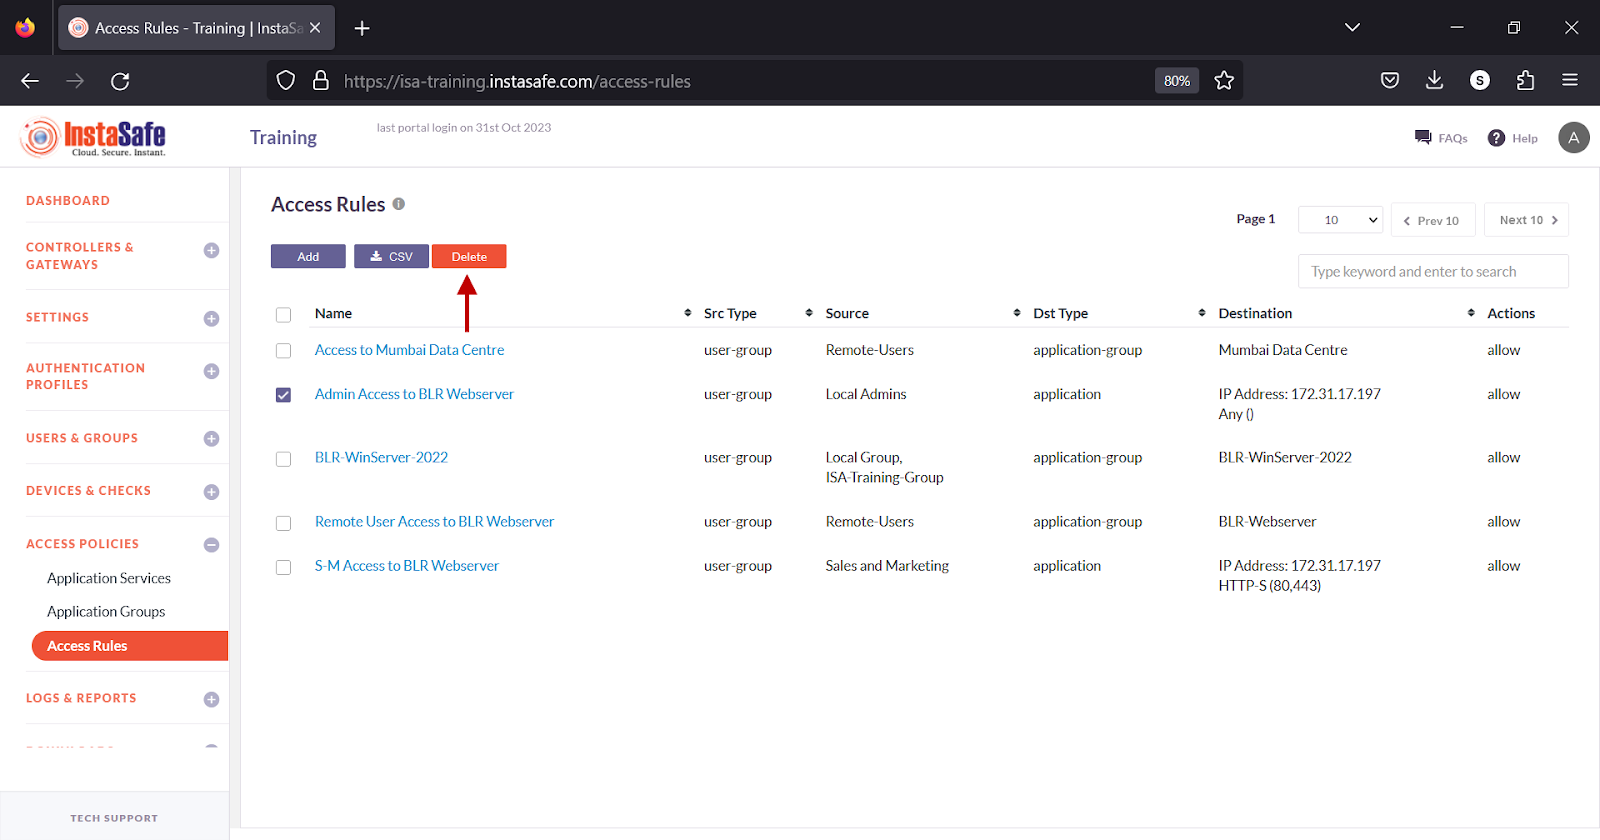
On the Access Rules page, enable the check box alongside the access rules you want to delete.

Click the Delete button at the top.
On the pop-up window, click Yes, Delete it!.
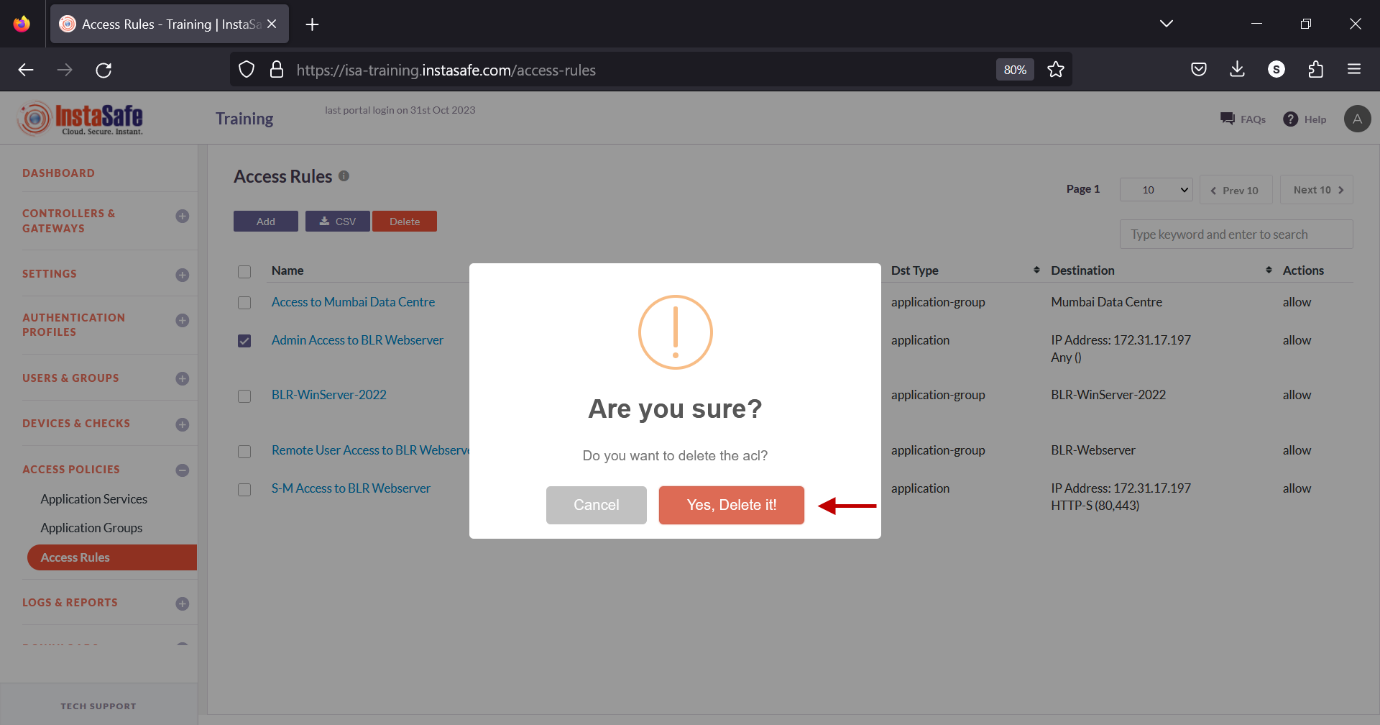
On the bottom left of the page, the message ACLs have been scheduled to be deleted is displayed.

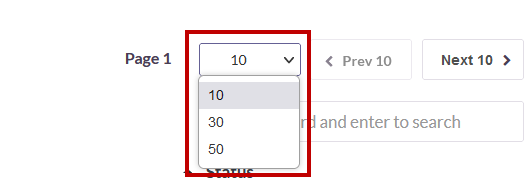
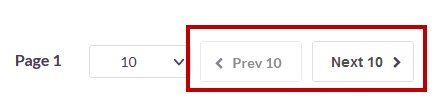
Click the drop-down box to select the number of rules to be displayed on the Access Rules page. By default, it is set to display 10 rules. You can change it to display either 30 or 50 rules.
Click the Next button to view the next page of rules. Click the Prev button to view the previous page.
You can search access rules by name by entering it in the search box.
Related Articles
Configuring Site-to-Site Connectivity with InstaSafe Secure Access (ISA)
Introduction InstaSafe Secure Access (ISA) provides site-to-site connectivity with advanced security features and simplified configuration. This article outlines the essential steps and features for configuring ISA site-to-site connectivity. When is ...Configuring Local Groups
This user guide describes the various configuration options to manage user groups on the ISA web portal. The User Groups page on the ISA web portal allows administrators to create user groups and add users to them. User groups can be created locally ...Access Rules
Access control rules are used to allow access to specific Applications or Application Groups from particular Users or User Groups. These are identity based rules that permit access on the basis of the Role of the users in the organization as opposed ...Configuring Application Groups
Application groups are pairing of IP addresses or network IDs and application services. More than one pairing can be configured within each group. Once defined, the groups are referenced in access rules. The following types of pairings can be created ...Configuring Microsoft Active Directory (AD) Integration on the ISA Web Console
Microsoft Active Directory (AD): Microsoft Active Directory (AD) is a directory service developed by Microsoft for Windows domain networks. It provides authentication and authorization mechanisms, as well as a framework for organizing and managing ...